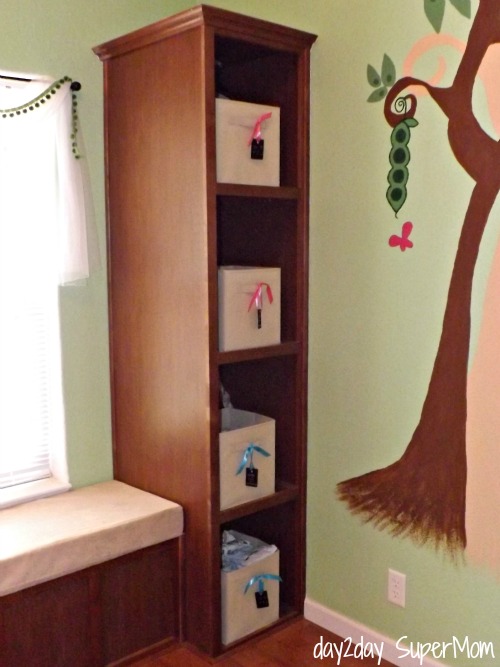
So making the conversion from bookshelf to dresser was relatively easy. A few canvas boxes, blue & pink ribbon and a quick trip to the local hardware store for a few samples...
Any guess as to what the pre-Chalk Board Labels are? That's right! Formica samples! I originally saw this idea from the brilliant Barb over at Second Chance to Dream and Pin'd it right away. Since the Formica samples are free, and I already had Rust-Oleum Chalkboard Spray,Ok so here is the quick & easy process. Lay out your samples to be painted. I chose darker samples just because I was going to be painting them black. But the paint does cover very well so any sample color will do!
Next, spray! Or paint with a sponge brush if you have Chalk Board paint by the can or have mixed your own. I gave mine a few quick coats and let them dry ~ only about 15 minutes!
Now it's time to label! Grab a piece of chalk and have at it! Since my tags were for labeling my canvas boxes aka 'dresser drawers' I proceeded to make quick notes as to the contents of each box. Because the Nursery is for Twins, one being a boy and the other a girl, I decided to use colored ribbon to hang the labels from. That way in a sleepless stupper I could easy find, or better yet easily tell SuperDad where a new set of PJ's are.
As the our little Twinkies grow, the labels can easily be changed to reflect what the boxes hold. Here's a quick look at the canvas-box-drawers before the label is added.
And after ~ BIG difference! Plus the pop of color looks cute!
This bookshelf now functions as a dresser! The top two units hold Sister's PJ's and swaddles for the next 3 months, the bottom units hold Brothers.
We have more built-in cabinets over the desk we covered in Part 1 and I used a few labels over there too.
Love how easy this project was. Love how easily I can change the labels over and over again. Which saves me time and energy ~ both of which I'm severally lacking right now! And love how the colored ribbon really ties the room and mural together. Stay tuned for Friday in Part 3 when I show the rest of the little details and the full picture of my Two Peas in a Pod mural =)


This is such a clever idea!
ReplyDeleteLookd great!
ReplyDeleteThanks!! =)
ReplyDeleteAwesome idea!
ReplyDeleteThanks so much for sharing at A Peek Into My Paradise TGIF Link Party! I can't wait to see what you link up next week! I hope to see you at the (Not SO) Wordless Wednesday Blog Hop! http://apeekintomyparadise.blogspot.com/
Have a terrific week!
Hugs, Cathy
Your awesome chalkboard tags were featured at Give Me the Goods Monday! I'd love for you to head over to check it out and grab a button: http://rainonatinroof.com/2013/07/give-me-the-goods-monday-features-15/
ReplyDeleteJenna @ Rain on a Tin Roof
Thank you SO much Jenna for the feature! WHOO HOO! =D
ReplyDeleteThis is a genius idea!! I think this will be my next Pinterest project. Thanks for sharing.
ReplyDeleteGlad you got inspired Kara =)
ReplyDelete